Appearance
Getting started with the Dashboard Builder
Both free and premium users have access to the Dashboard Builder. The two versions have identical user interfaces. The most important differences between the free and premium versions are:
- The premium version allows users to add custom content.
- The premium version allows users to change dimension settings interactively.
- The premium version allows users to change layout settings interactively.
- The premium version supports built-in CSS editing.
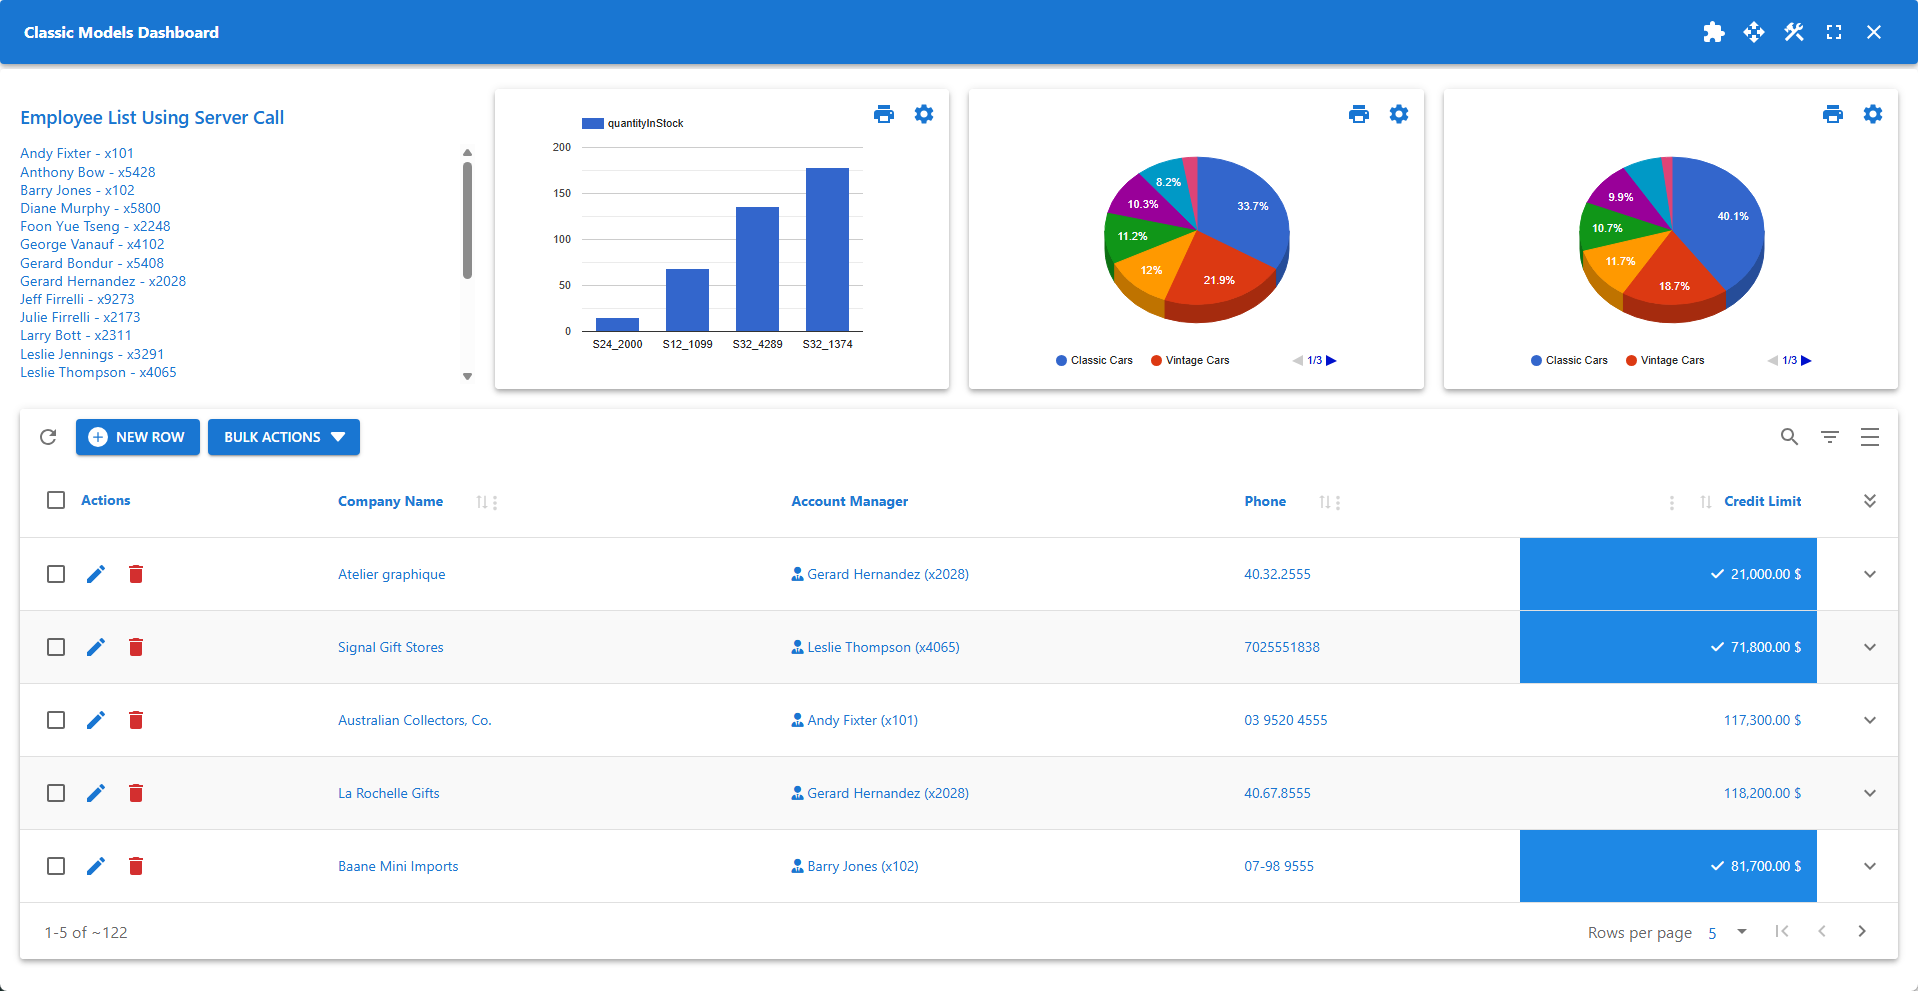
✨ Example of a Dashboard containing five Widgets
Accessing the Dashboard Builder
![]()
The Dashboard Builder icon is available on the toolbar.
To access the Dashboard Builder:
- Open your WP Data Access dashboard.
- Navigate to the App Builder.
- Click the Run & Build link or icon for your app.
- Click the Dashboard Builder icon on the toolbar.
Dashboards
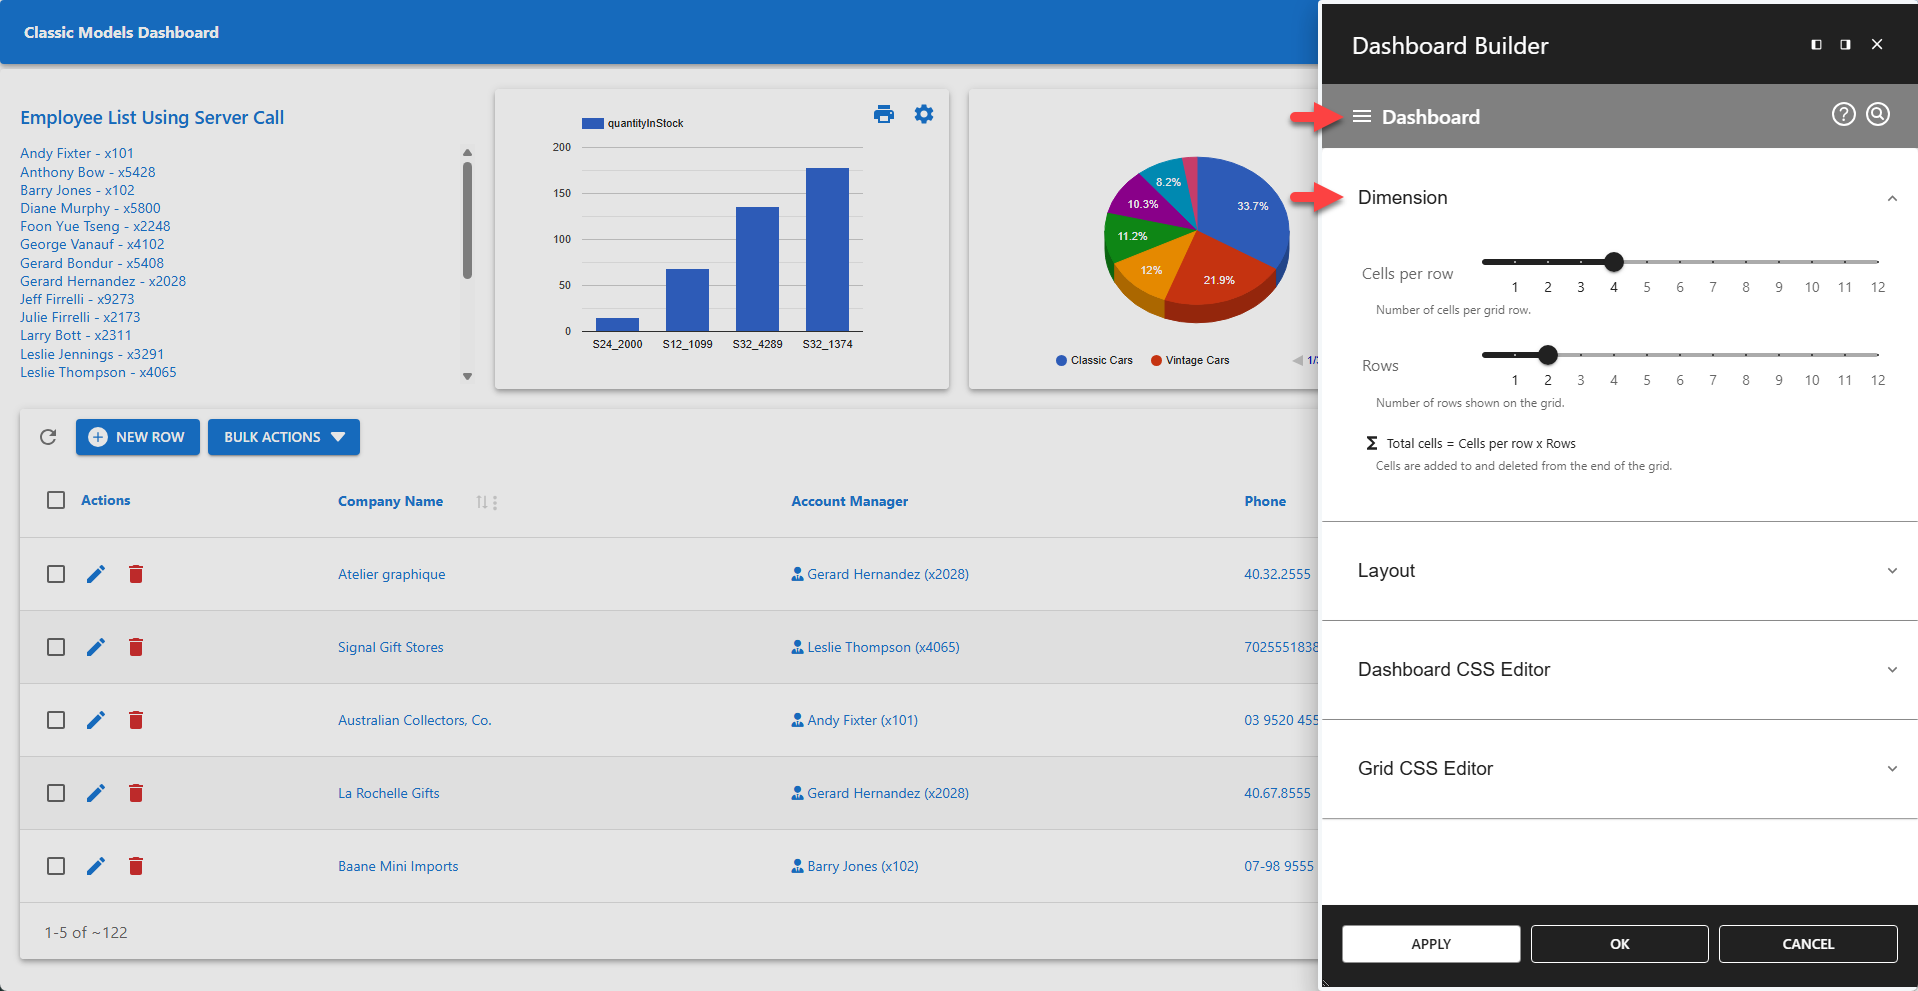
Dashboards are grid-based. Widgets are assigned to grid cells. The maximum number of widgets shown on a dashboard can be defined in the Dimension section of the Dashboard Builder. The actual number of widgets shown can differ if widgets take up more than one grid cell. This can be configured in Widget Settings, which is available for each widget individually.
Accessing Widget Settings

Widget Settings are available from the Widget Settings icon, shown on the top left of each widget. These icons are only available in Widget Mode, which can be enabled by clicking the Widget Mode icon on the toolbar.
Widgets
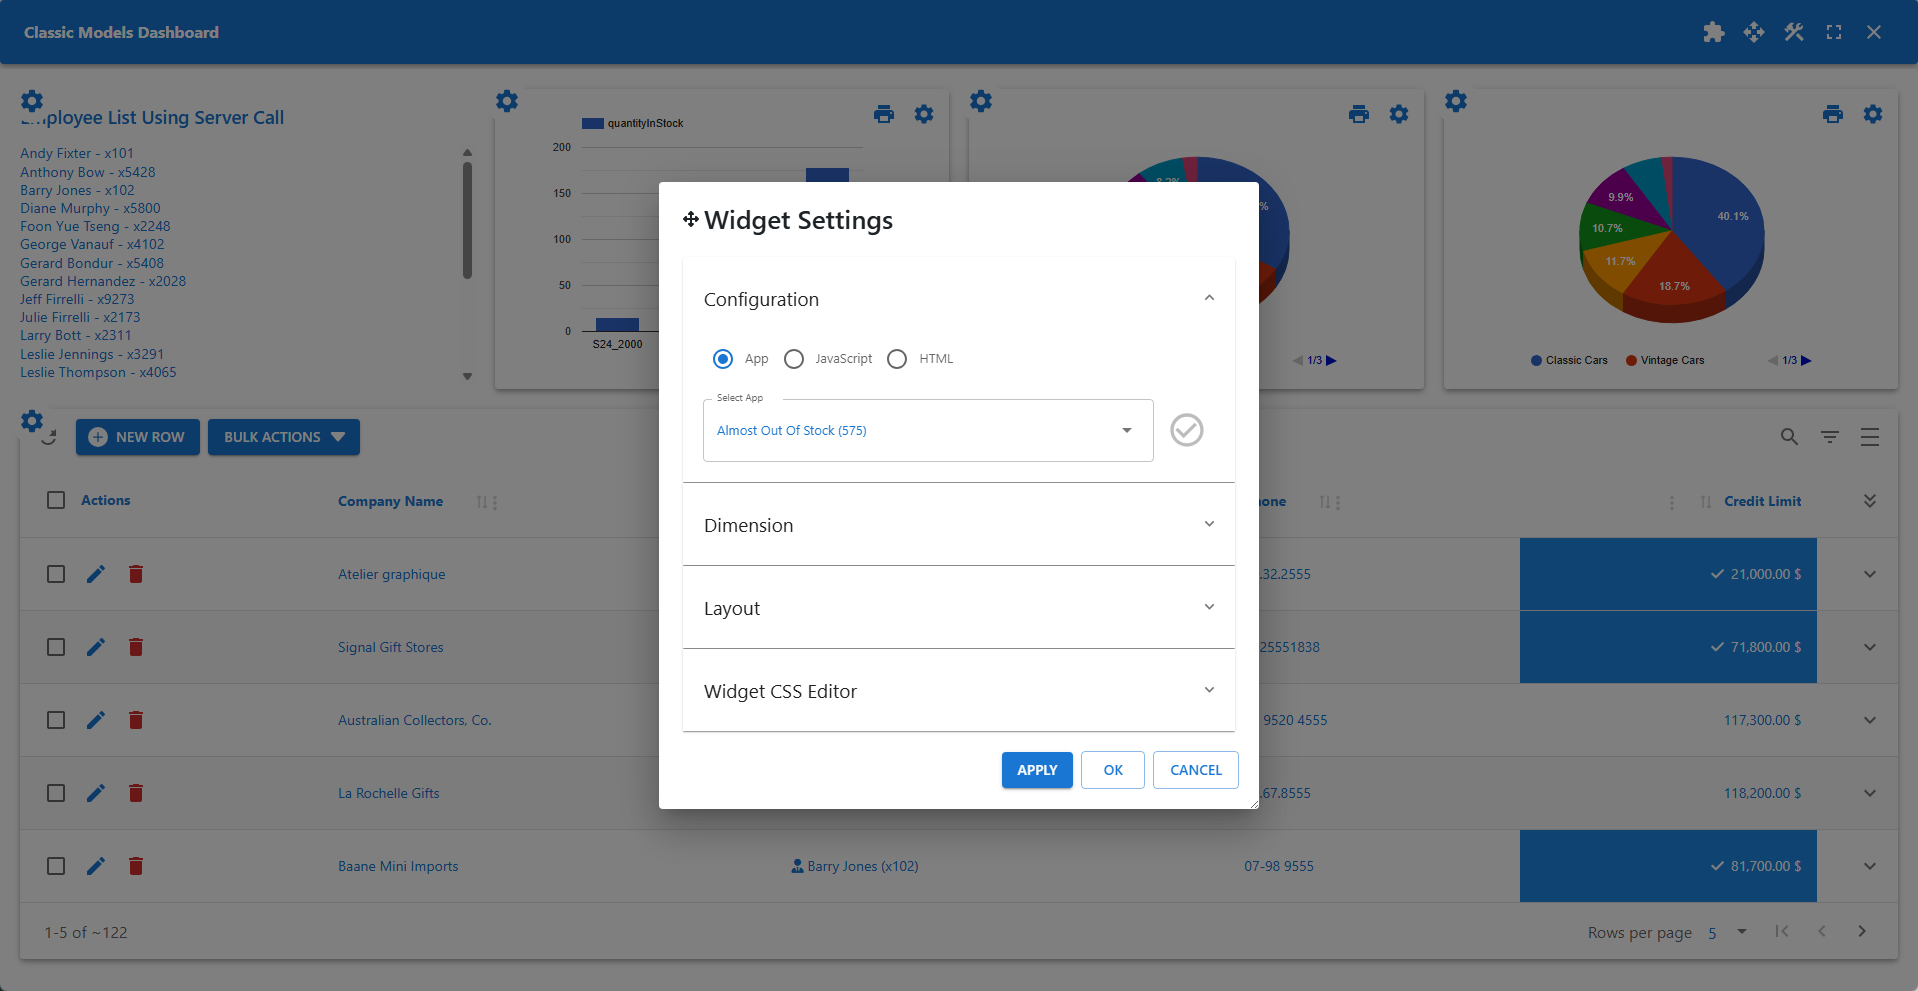
The type of widget can be defined in the Widget Settings dialog. All app types are supported. JavaScript widgets can be used to create custom interactive widgets. These widgets can access server-side PHP functions using built-in wpdaCallService. HTML widgets can be used to create custom static widgets. The dimensions section can be used to span a widget over multiple columns or rows.