Appearance
Relationships
Relationship Wizard
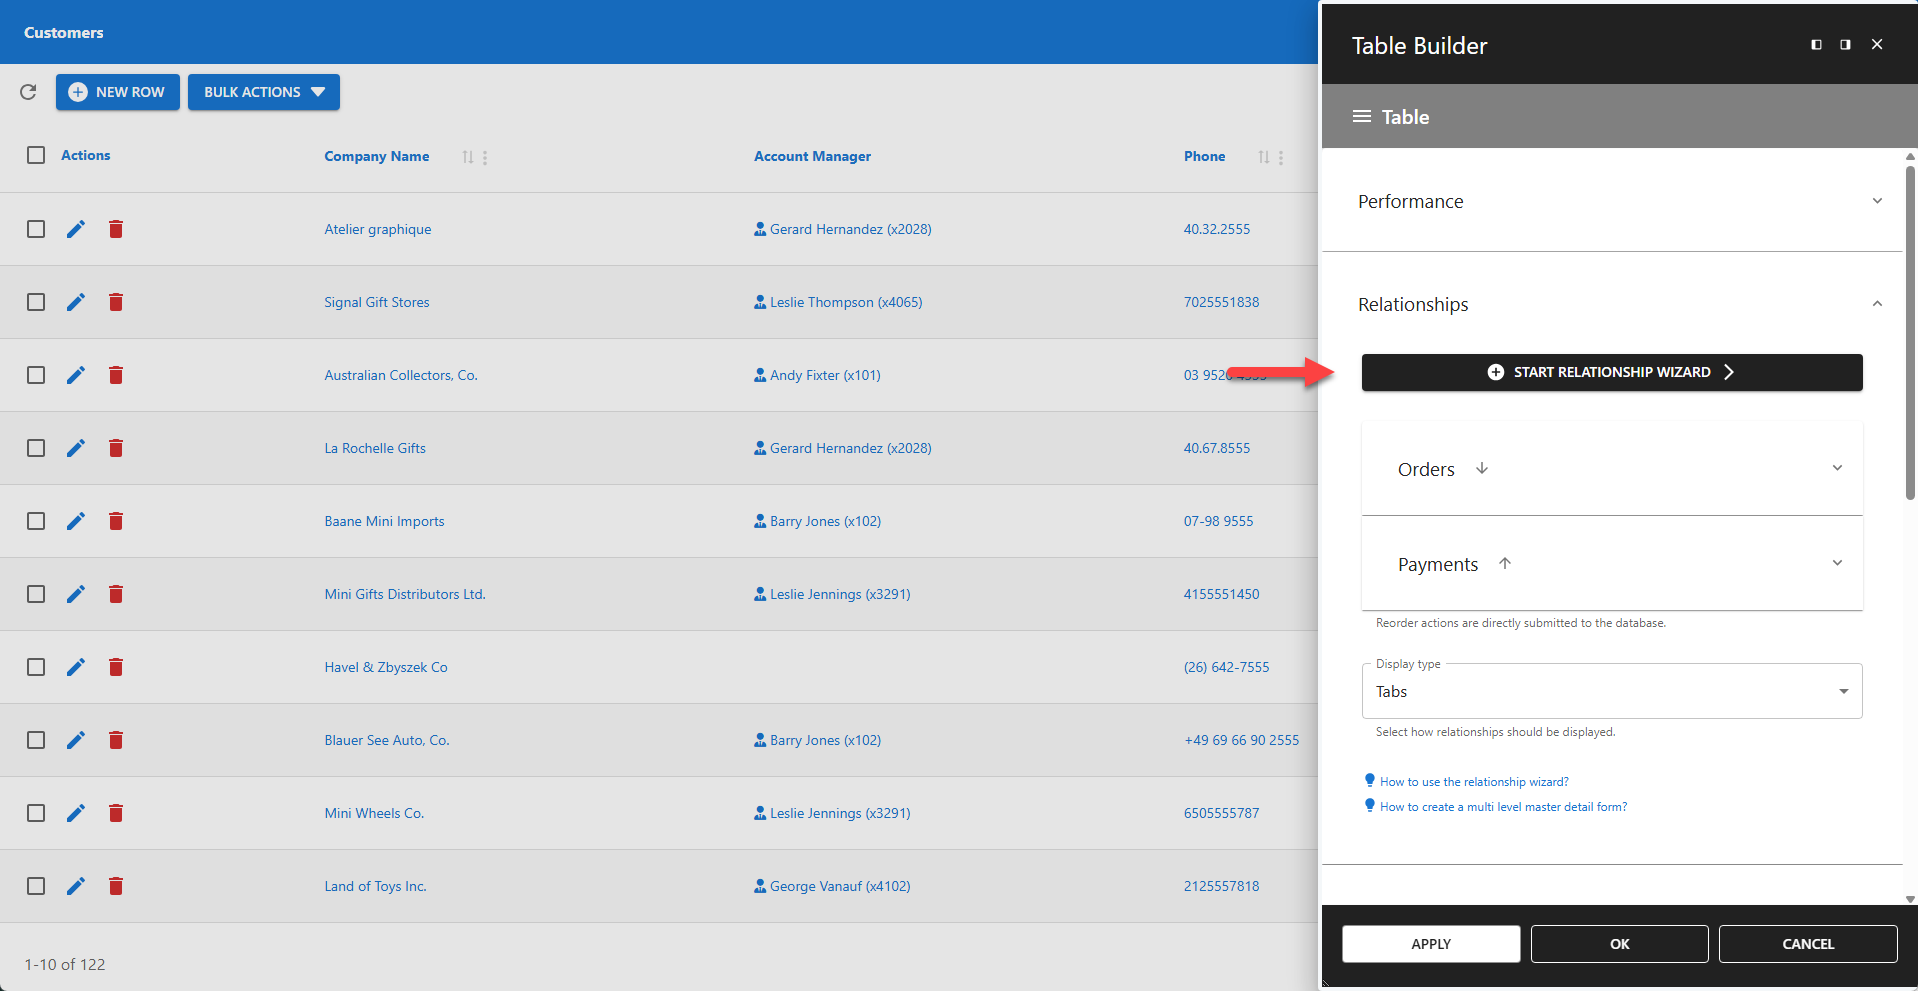
To add a relationship, click the Start Relationship Wizard button and follow the step-by-step instructions. Newly created relationships are added to the bottom of the form. You can choose how to display each relationship by selecting a display type: Accordion, Tabs, or Titles. Repeat this process to add multiple relationships.
⚙️ Cardinality
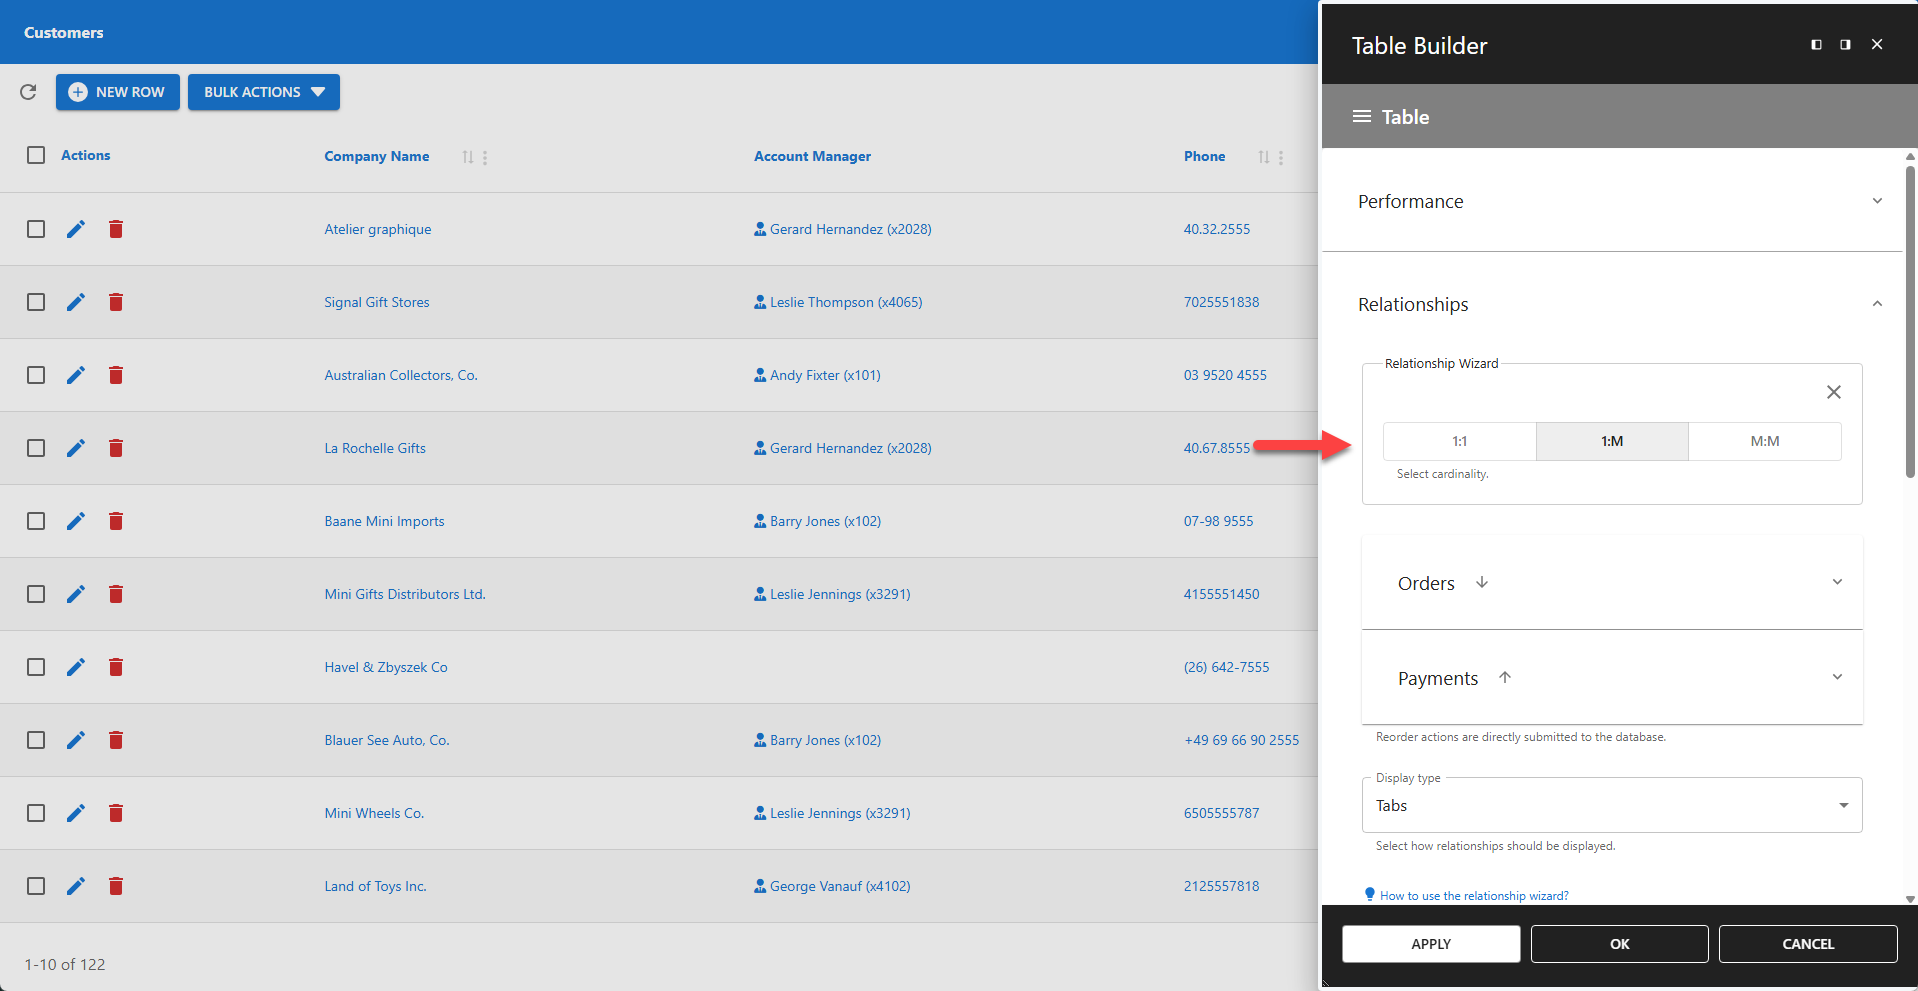
The Relationship Wizard begins by selecting the relationship's cardinality. Click the option that best fits your data model.
✅ 1:1 ⇒ One-to-One
✅ 1:m ⇒ One-to-Many
✅ m:m ⇒ Many-to-Many
⚙️ Relationship Title
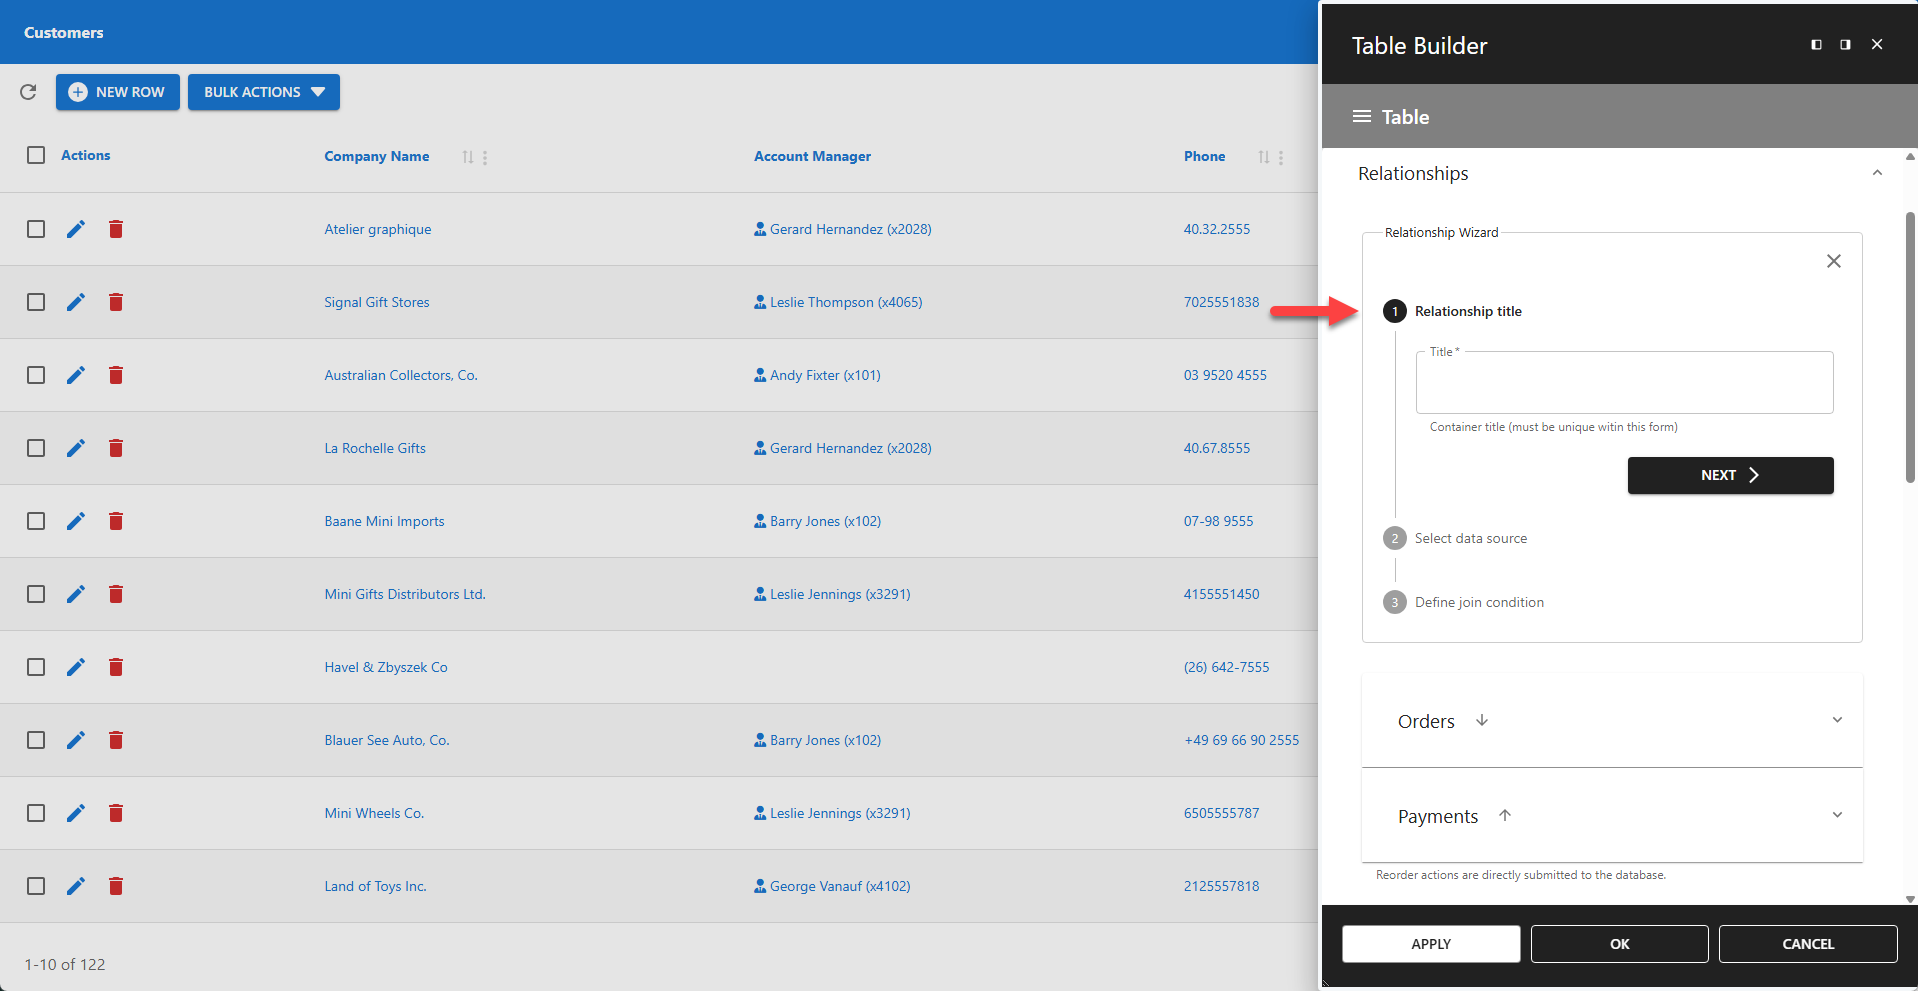
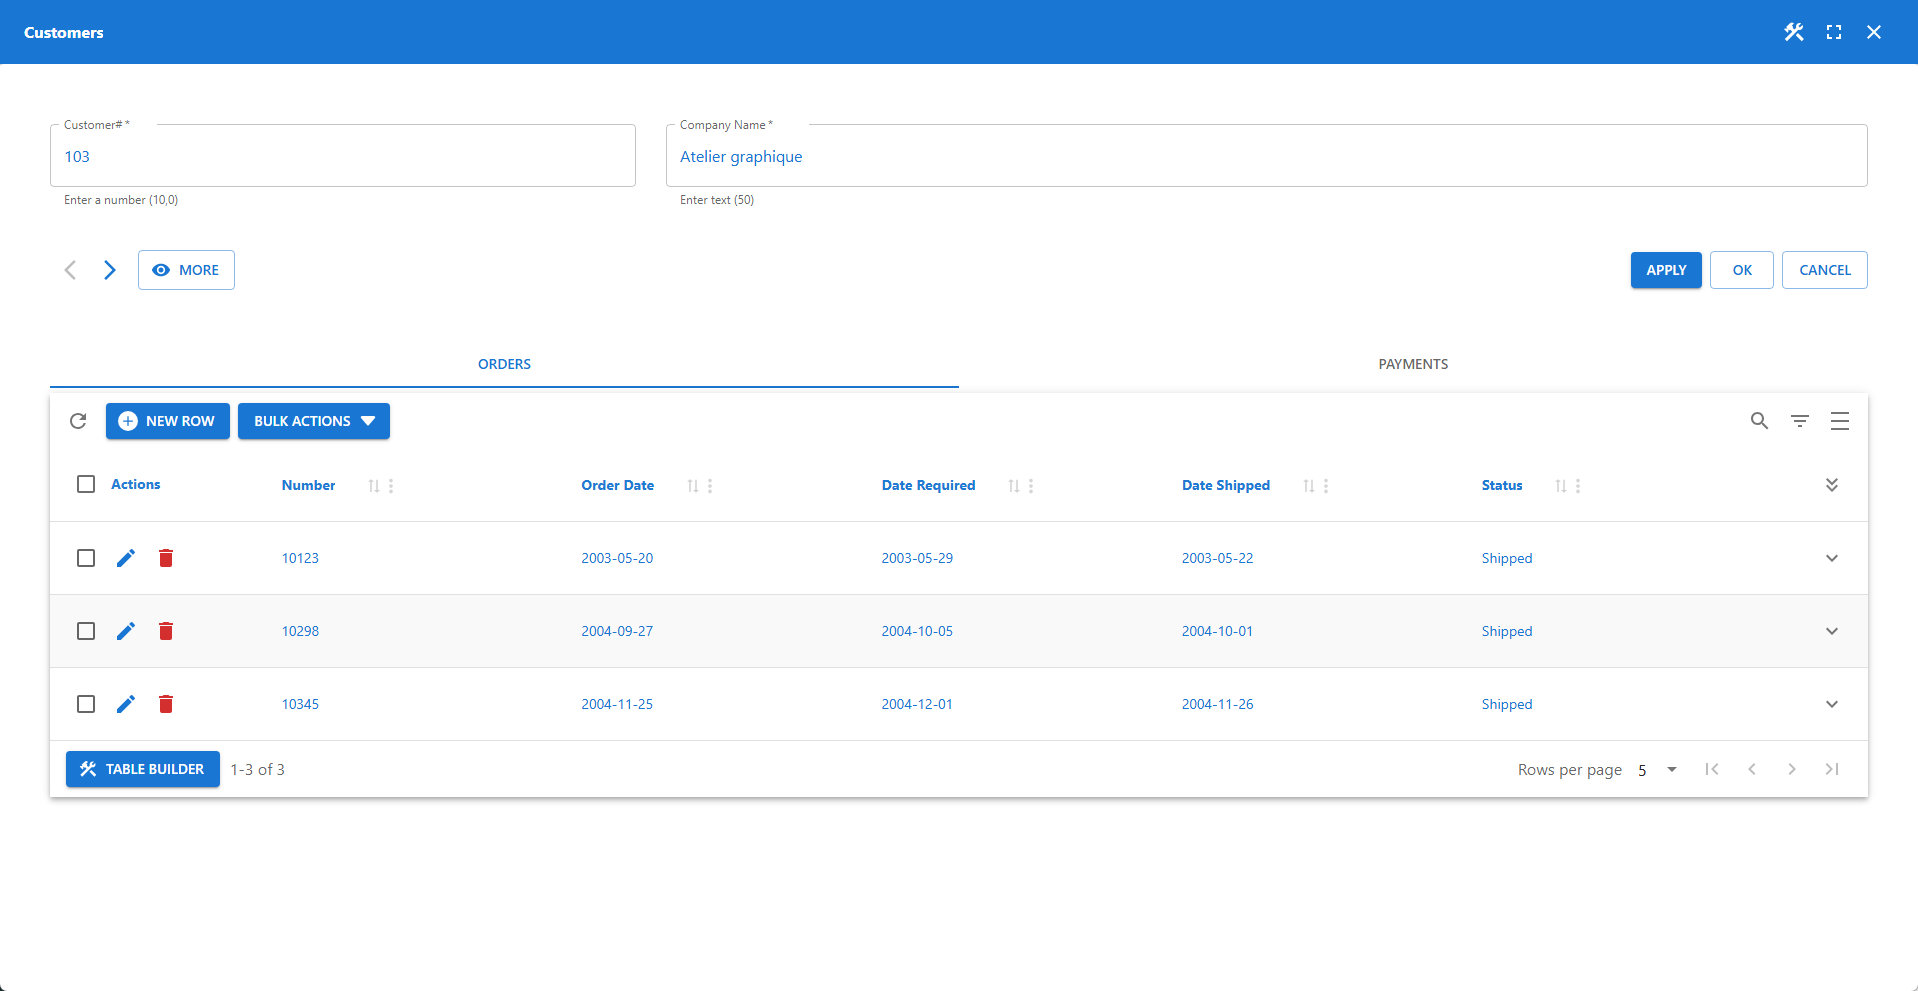
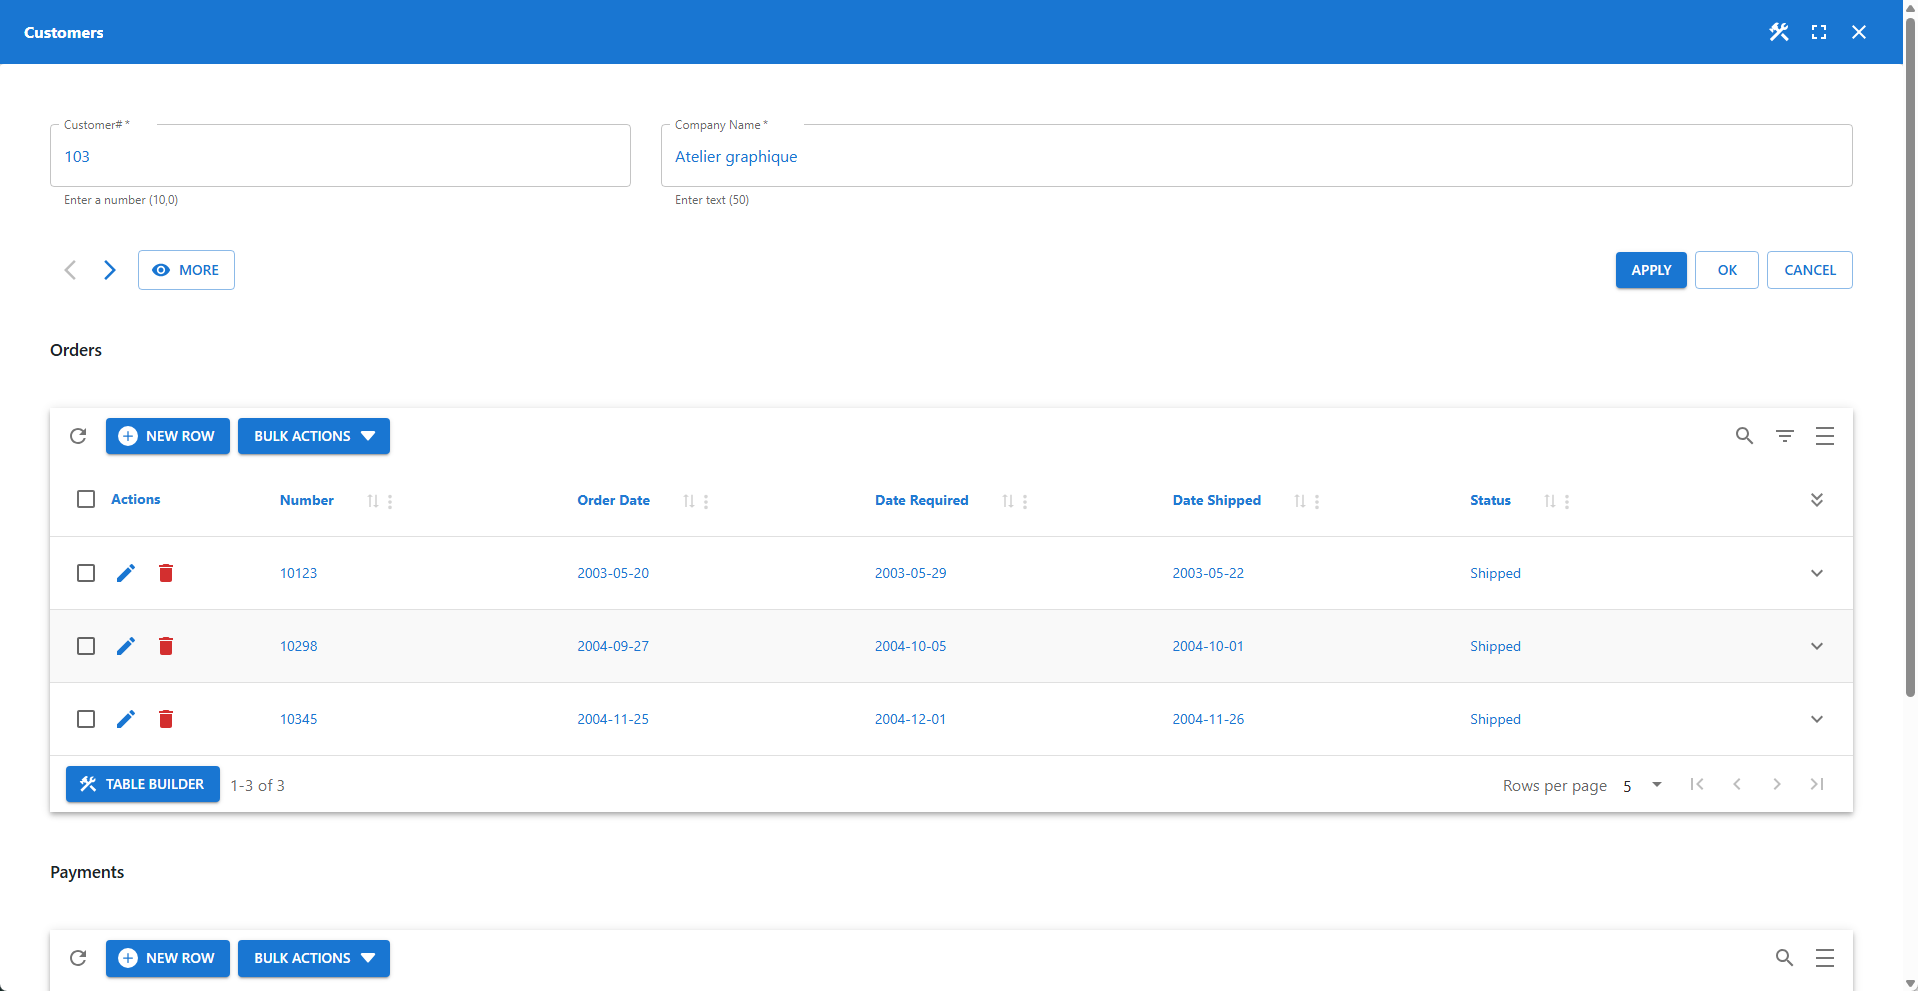
The relationship title is displayed on the accordion header, tab, or container. Ensure titles are both descriptive and unique within the form.
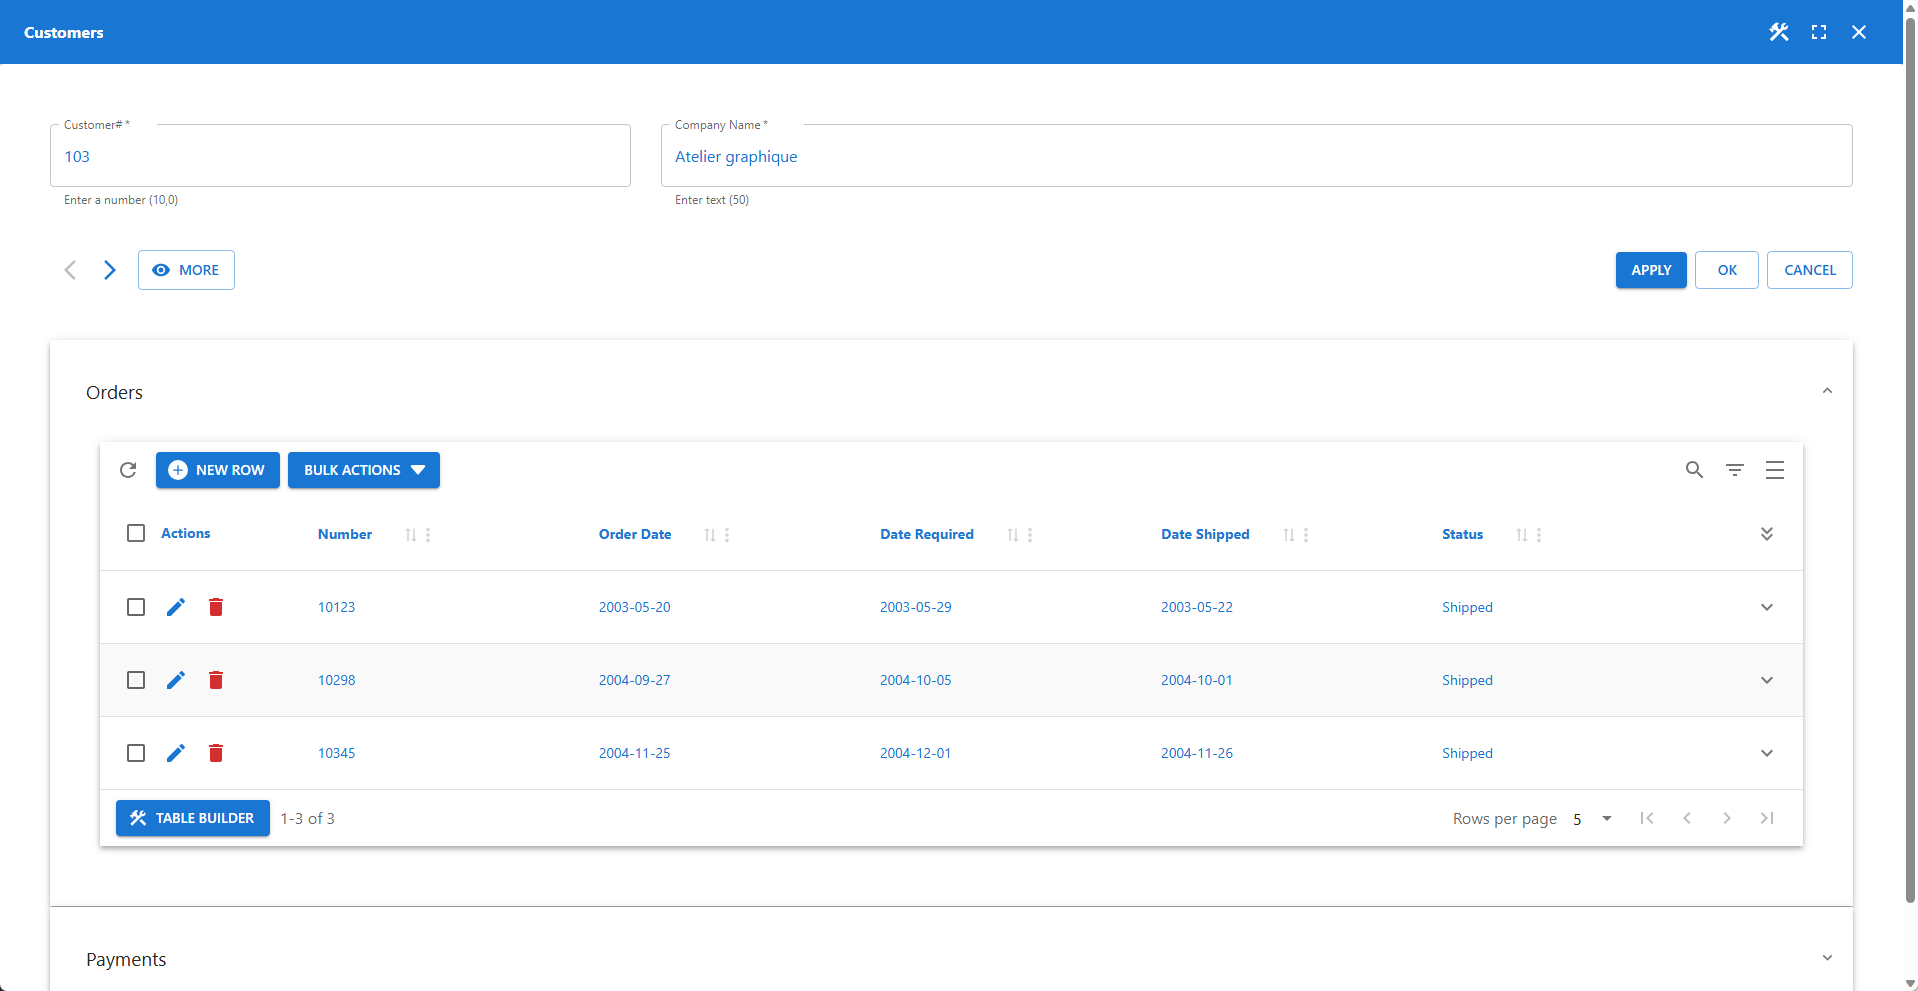
The screenshot shows two relationships titled "Orders" and "Payments".
⚙️ Data Source
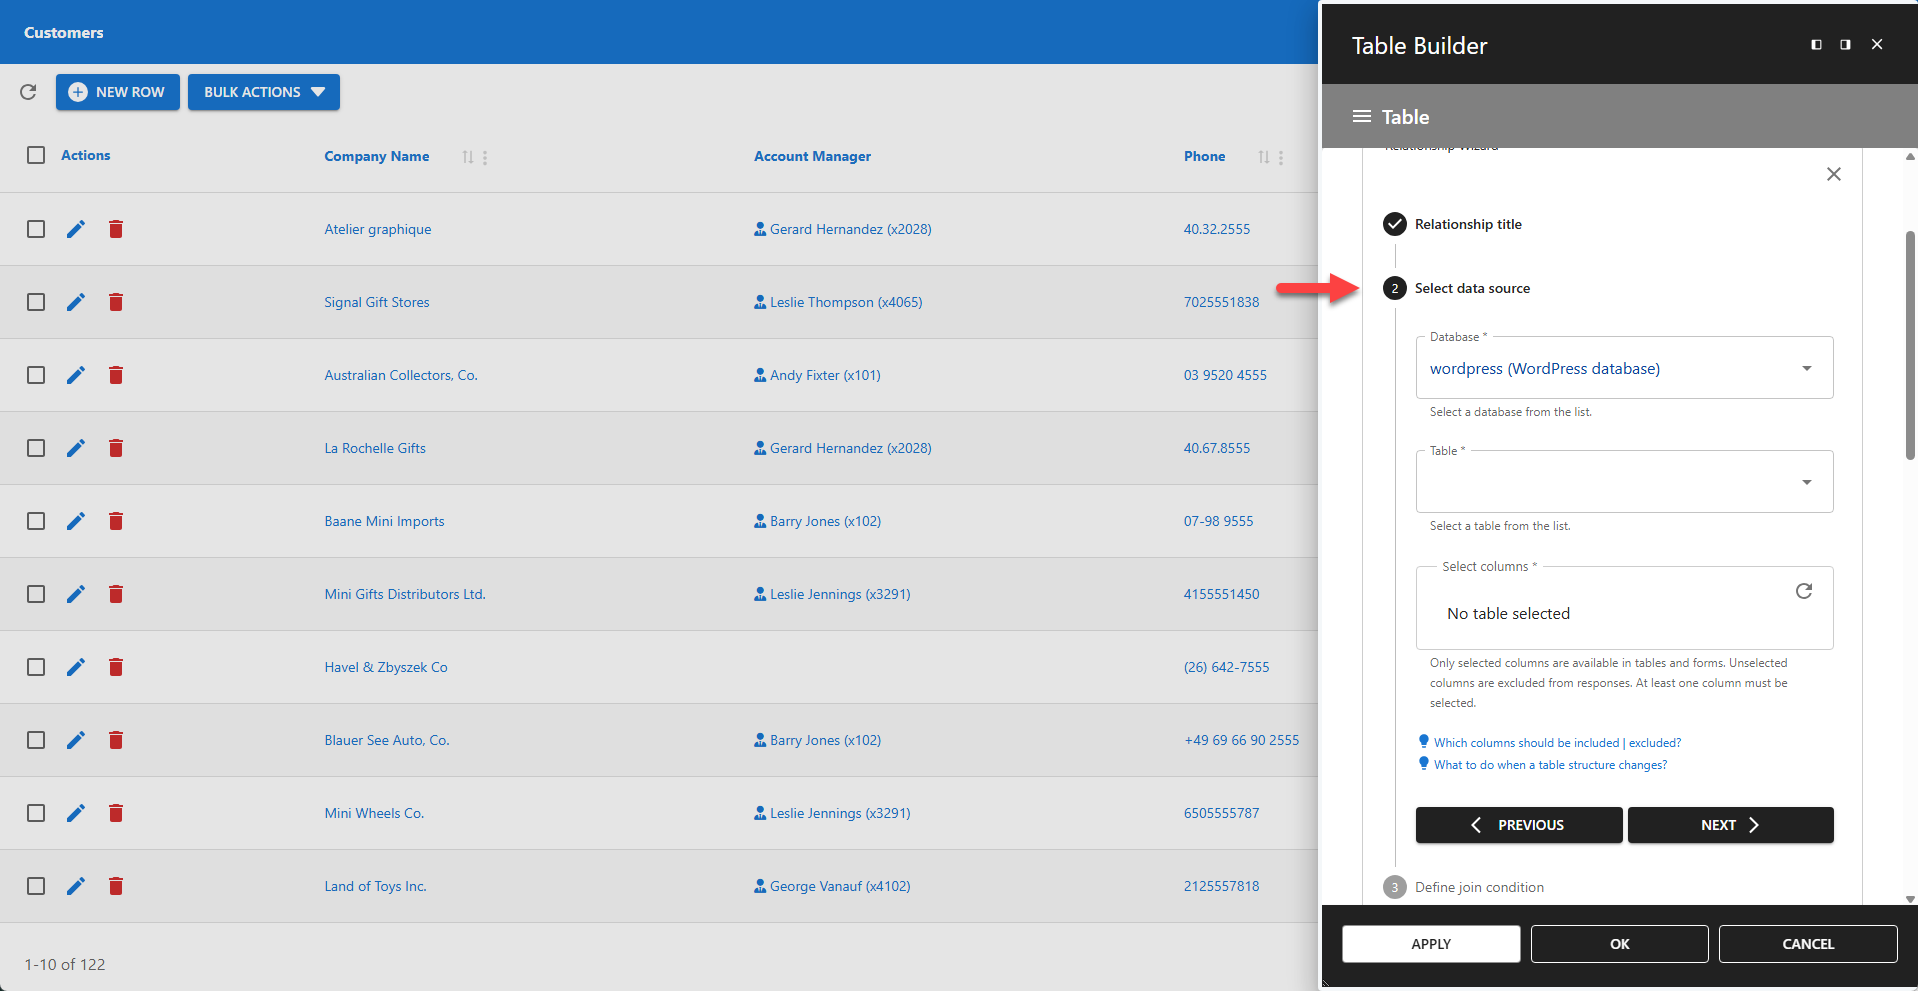
The Data Source section requires three mandatory fields:
✏️ Database - This can be your local WordPress database or a remote database.
✏️ Table - Can be a base table or a view.
✏️ Columns - In most cases, you can simply select all columns.
📌 You can hide specific columns later in the Table Builder or Form Builder for the detail table. The advantage of hiding columns at a later stage is that their values remain accessible for computed fields and hooks. Only deselect columns here if they contain sensitive data that must never be included in server responses, ensuring their privacy.
📌 If the structure of your related table changes, you must update the relationship. Click the refresh icon to fetch the new structure, save the changes, and then use the Table Builder and Form Builder sequentially to apply the updated structure.
⚙️ Join Condition
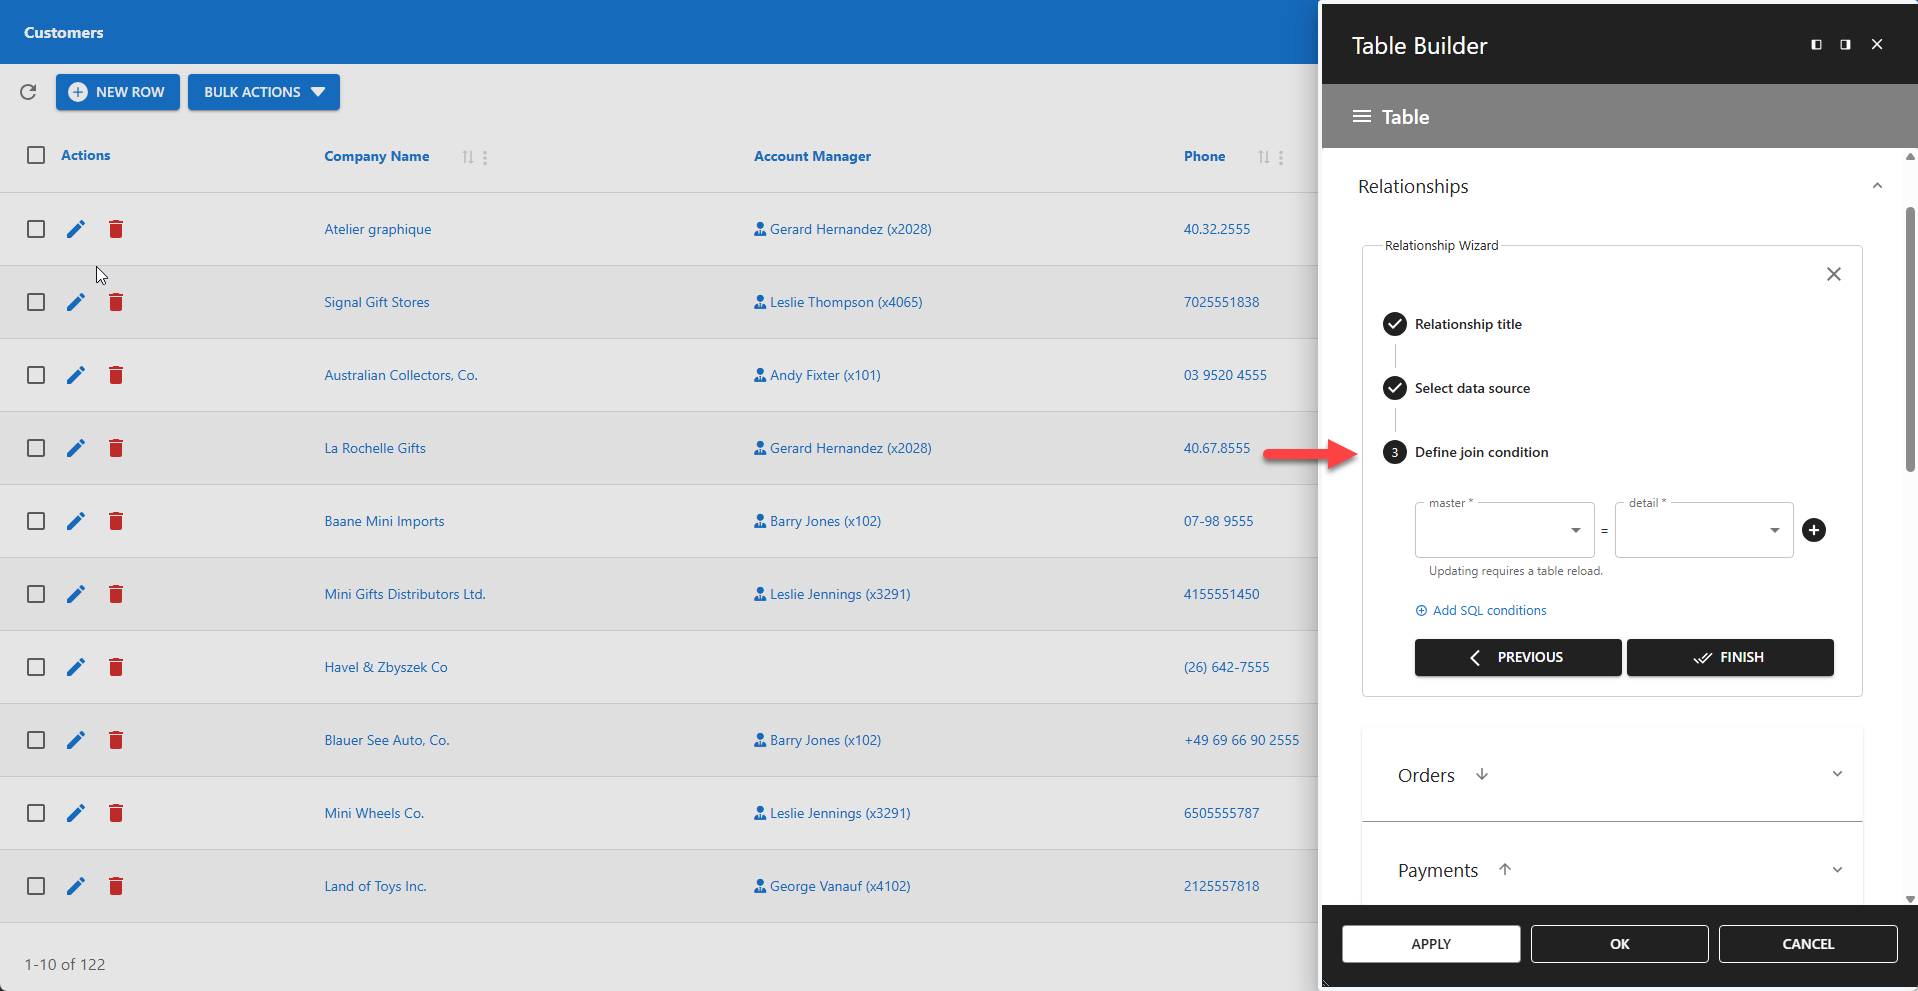
The join condition defines how the detail table is linked to the master table. This is used to automatically insert master column values into detail records and to protect these values from being updated.
✚ Click the plus icon to add multiple join conditions.
📌 Add SQL Conditions
This opens a powerful SQL editor that allows you to extend the join condition with custom SQL logic.
SQL Examples
✨ Basic
sql
where first_name like 'Sacha%'sql
where user_id in
	(
		select user_id
		from wp_usermeta
		where meta_key = 'wp_capabilities'
		  and meta_value like '%coach%'
	)
sql
where order_date between date_sub(now(), interval 1 week) and now()sql
where status = 'send'
  and order_date > date_sub(now(), interval 1 week)
✨ Advanced
Accessing the WordPress User ID 🔍
The session variable @wpda_wp_user_id is available to access the current WordPress user's ID.
sql
where user_id = @wpda_wp_user_idUsing URL Parameters 🔍
The functions httpGet, httpPost, and httpRequest can be used to access HTTP parameters. They return null if the parameter is not found.
sql
where product_id = httpPost['my_product_id']
   or httpPost['my_product_id'] is null
Using Shortcode Parameters 🔍
The function shortcodeParam can be used to access shortcode parameters. It returns null if the parameter is not found.
sql
where student_id = shortcodeParam['student_id']
   or shortcodeParam['student_id'] is null
⚙️ M:M Relationships

Adding a Many-to-Many (m:m) relationship follows a slightly different process. The screenshot shows an m:m relationship between the Student and Course tables, as outlined in the data model below. This allows a student to be registered for multiple courses and a course to be attended by multiple students.
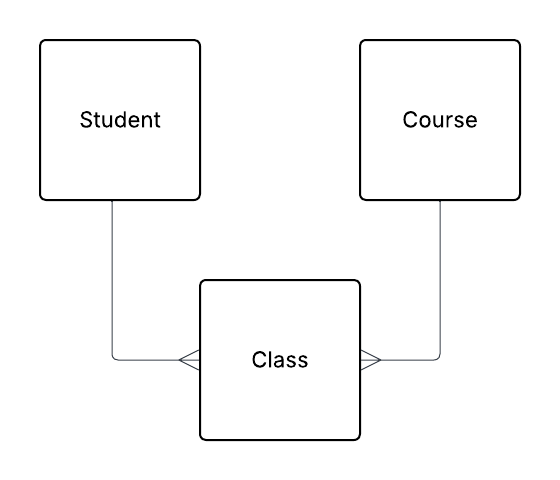
Definitions
✅ Student is the base table
✅ Class table is the join table (or junction table)
✅ Course is the relation table
An m:m relationship requires you to define the data source and join condition for both the join table and the relation table. This is different from 1:1 and 1:m relationships, which only have a single detail table, and is why the m:m wizard requires two additional steps.
Updating an Existing Relationship
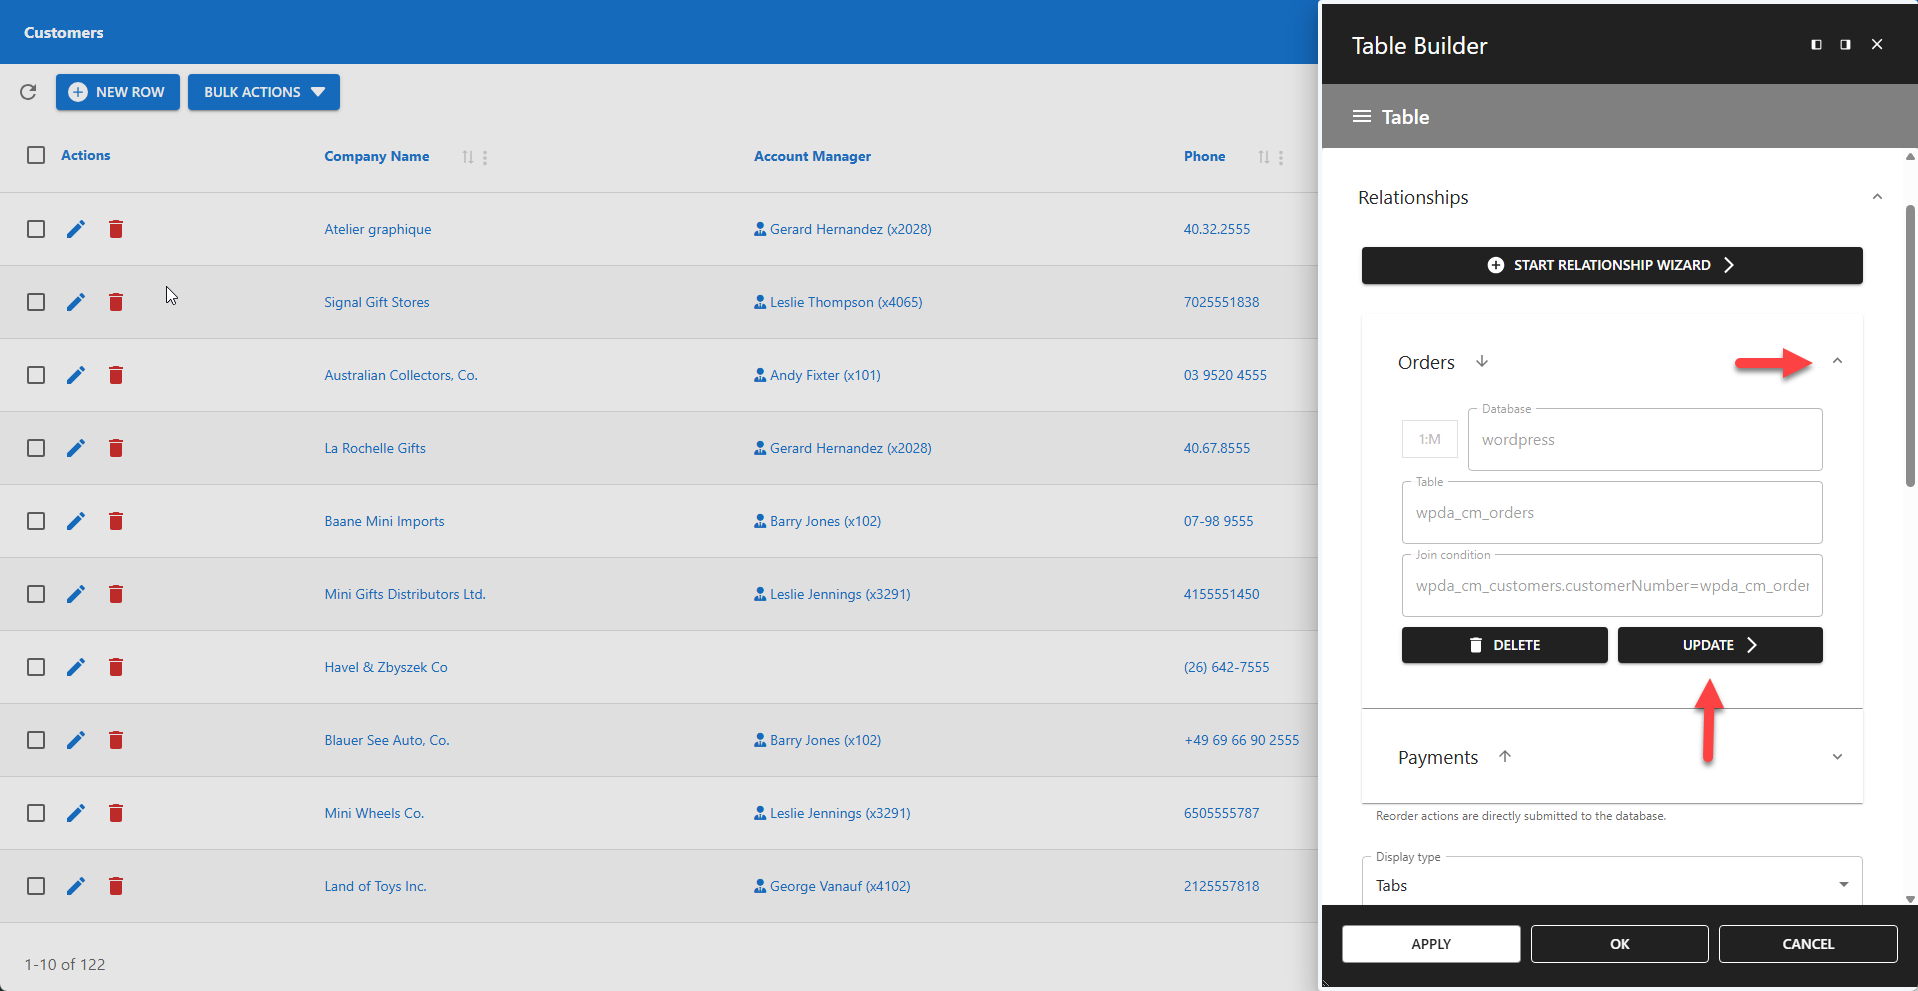
⚙️ Updating an existing relationship uses the same Relationship Wizard as creating a new one.
To edit a relationship:
- Expand the relationship section.
- Click the UPDATE button.
- Follow the instructions in the Relationship Wizard.
Reordering Existing Relationships

⚙️ You can easily change the display order of relationships using the arrow icon buttons, as shown in the screenshot.
- Click the arrow down icon to move a relationship down the list.
- Click the arrow up icon to move a relationship up the list.
Delete a Relationship

⚙️ To permanently delete a relationship:
- Expand the relationship section.
- Click the DELETE button.
Display Type
⚙️ Relationships can be displayed in three different formats:
- Accordion: Content is collapsed into expandable sections.
- Tabs: Content is separated into different tabs.
- Titles: Content is displayed under simple section titles.
✨ Examples of available display types
Multi-level relationships
![]()
The App Builder supports multi-level relationships (e.g., grandparent → parent → child → grandchild). The Table Builder and Form Builder for the master table are accessible from the main app toolbar. The builders for detail tables are available from the table or form footer.
To add a relationship to a detail table (creating a nested relationship):
- Open the detail table.
- Open its Table Builder or Form Builder from the footer.
- Navigate to the Relationships section and start the Relationship Wizard.
There is no hard limit on the number of levels, but be aware that deeply nested relationships require more resources and can impact performance, especially for users on lower-capacity devices.
Notes
- Relationships can be established between tables in both local and remote databases.
- The base table and its related tables can be stored in different databases.
- For m:m relationships, the join table must reside in the same database as the relation table.
- If a related table's structure changes, click the refresh icon to fetch and apply the new schema.